How to Watch Snap Videos Again
1. Overview
A snap is a bundle of an app and its dependencies that works without modification across many different Linux distributions. Snaps are discoverable and installable from the Snap Store, an app store with an audience of millions.
Snapcraft is a powerful and piece of cake to apply command line tool for edifice snaps. It reads a simple, declarative file and runs the build for us.
In this tutorial, we're going to explore some of snapcraft's best features earlier using it to create an platonic kickoff snap. For a more detailed await at edifice snaps, see Creating a snap in the official documentation.

What y'all'll learn
In this tutorial, we'll cover how to: - install the snapcraft tool - create a new project - declare snap metadata - use parts to define an app - build a snap - fix common build issues - upload a snap to the Snap Store
What you'll need
- Ubuntu twenty.04.one LTS (Focal Fossa), or later, or a derivative
- running from a nested VM requires accelerated/nested VM functionality
- basic command line knowledge and how to edit a file
- rudimentary knowledge of snaps
For an introduction to snaps, and how to utilise them, take a look at Getting started.
How will yous use this tutorial?
What is your current level of experience?
Originally authored by Gerry Boland.
2. Getting started
This tutorial has been written to work on Ubuntu 20.04 LTS. Withal, it should piece of work without modification on after Ubuntu releases and other GNU/Linux distributions derived from an Ubuntu 18.04+ base, such every bit Linux Mint xix.x.
Installing dependencies
First, open up up a terminal and brand sure you take snap installed:
$ snap version If information technology's installed, you lot'll come across something similar to the following:
snap 2.49 snapd two.49 series xvi ubuntu 20.04 kernel v.4.0-62-generic Encounter Installing snapd if snap isn't installed.
We can at present install Snapcraft with a unmarried command:
$ sudo snap install --classic snapcraft NOTE: The --classic switch enables the installation of a snap that uses archetype solitude. We discuss snap security confinement in the following section.
We're all set. Permit'southward get cracking and build our outset snap!
three. Edifice a snap is easy
Starting the project
The offset affair to do is to create a general snaps directory followed by a working directory for this specific snap project:
$ mkdir -p ~/mysnaps/hullo $ cd ~/mysnaps/hello It is from within this hello directory where nosotros will invoke all subsequent commands.
Note: Due to a limitation in the projection we're going to build, the path of the directory you lot put the hello directory in shouldn't contain any spaces.
Get started by initialising your snap environment:
$ snapcraft init This creates a snapcraft.yaml in which you declare how the snap is built and which properties it exposes to the user. We volition edit this subsequently.
The directory structure now looks like this:
mysnaps/ └── hello └── snap └── snapcraft.yaml Note: Any futurity snaps you lot desire to create should be put within their own directory under mysnaps.
Describing the snap
Allow'due south take a expect at the acme part of your snapcraft.yaml file. It should await somewhat every bit shown below:
name: my-snap-proper name # y'all probably desire to 'snapcraft register <proper noun>' base: core18 # the base snap is the execution environment for this snap version: '0.one' # merely for humans, typically '1.2+git' or 'one.3.two' summary: Single-line elevator pitch for your amazing snap # 79 char long summary description: | This is my-snap's description. You have a paragraph or two to tell the well-nigh important story about your snap. Go along it under 100 words though, nosotros live in tweetspace and your description wants to look good in the snap store. course: devel # must be 'stable' to release into candidate/stable channels confinement: devmode # use 'strict' once you take the right plugs and slots This part of snapcraft.yaml is mandatory and is basic metadata for the snap.
Let's go through this line by line:
-
name: The name of the snap.
-
base of operations: A foundation snap that provides a run-time environment with a minimal set of libraries that are common to virtually applications. The template defaults to using
core18, which equates to Ubuntu eighteen.04 LTS. See Base of operations snaps for farther options. -
version: The current version of the snap. This is merely a homo readable cord. All snap uploads will get an incremental snap revision, which is contained from this version. It'southward separated so that y'all can upload multiple times the same snap for the same architecture with the same version. Run into it as a cord that indicates to your user the electric current version, like "stable", "2.0", etc.
-
summary: A short, i-line summary or tag-line for your snap.
-
description: A longer description of the snap. It can bridge over multiple lines if prefixed with the '|' character.
-
grade: Can be used by the publisher to indicate the quality conviction in the build. The store volition prevent publishing 'devel' grade builds to the 'stable' channel.
-
confinement: A snap's confinement level is the degree of isolation it has from your system, and there are three levels:
strict,classicanddevmode. strict snaps run in complete isolation,archetypesnaps accept open admission to organization resources and devmode snaps run as strict just with open up access to the system. The latter is ideal for development, but your snap will demand move from devmode to be published. See Snap confinement for more than details.In this tutorial, we will focus on
devmodeandstrictconfinement.
For more detailed information on this tiptop-level metadata, see Adding global metadata.
And that'south it for the basics. It's now time to customise the snapcraft.yaml file for our ain snap. Taking the above into business relationship, we tin can change the superlative of the file to be:
name: hello base: core18 version: '2.10' summary: GNU Hullo, the "hello world" snap clarification: | GNU hello prints a friendly greeting. grade: devel solitude: devmode Note: Version information is for snap user consumption just, and has no issue on snap updates. It'southward defined within quotes, ('2.ten'), because it needs to be a YAML cord rather than a floating-betoken number. Using a cord allows for non-numeric version details, such as 'myfirstversion' or '2.3-git'.
Adding a part
Parts are used to describe your application, where its various components can be found, its build and run-fourth dimension requirements, and those of its dependencies. A snap consists of one or more than parts, depending on its complexity.
Here are a few multiple-role snap examples:
- snaps with separate logical parts, such as a server snap containing a web server, a database and the awarding itself
- a game which ships the game engine and game data for three different games, each one being defined in its own part
- snaps with parts from different locations - parts which are congenital in a different way
Our hello snap will exist nice and simple. It volition consist of only one part for now. In the following pages we are going to gradually extend it.
Two must-haves for every part are the 'source' and 'plugin' definition. Think of these as the "what" and the "how", respectively. Every bit source yous can, for instance, pick a source repository (like git), a tarball, or a local directory. Snapcraft supports many plugins, allowing you lot to build a wide diverseness of projection types (east.g. autotools, cmake, become, maven, nodejs, python2, python3).
To build hello, add the following 'parts' stanza to your snapcraft.yaml file (replace anything else that might be there):
parts: gnu-hullo: source: http://ftp.gnu.org/gnu/hello/hello-ii.x.tar.gz plugin: autotools So we have added a part called gnu-hello (its proper name is arbitrary). For 'source', we specified a tarball located on the GNU project's FTP server. Equally 'plugin' we've chosen autotools which uses the traditional ./configure && make && make install build steps.
Encounter Supported plugins, or run snapcraft list-plugins, to become more information on which build-tools and platforms Snapcraft supports.
To build our snap all you need to practice is:
$ snapcraft The first time you run snapcraft, you may be asked for permission to install Multipass. Snapcraft uses Multipass to both simplify the build process and to confine the build surroundings within a virtual machine. It offers the best build experience, then we highly recommend answering 'y'. Notwithstanding, if you'd rather not utilize Multipass, you tin besides build natively, remotely, and with LXD. Encounter Build options for details.
During the build, snapcraft volition show plenty of output, however a successful build volition cease with:
[...] Staging gnu-hello + snapcraftctl stage Priming gnu-hello + snapcraftctl prime number Snapping | Snapped hello_2.10_amd64.snap Congratulations! Yous've merely built your first snap, which is at present fix to be installed:
$ sudo snap install --devmode hello_2.10_amd64.snap The output should declare:
hello 2.x installed To get some info on the installed snap:
$ snap list hi Sample output:
Name Version Rev Tracking Publisher Notes hello two.10 x1 - - devmode Let's try to execute it:
$ how-do-you-do On traditional Ubuntu you will get:
The program 'hi' can be found in the following packages: * hello * hello-traditional Effort: sudo apt install <selected package> Or you might become a different error if you previously installed the hi snap:
$ hullo Output:
bash: /snap/bin/hullo No such file The control doesn't exist despite being function of our snap and installed! Indeed, snaps don't expose anything to the user by default (control, services, etc.). Nosotros take to practice this explicitly and that's exactly what you are going to tackle next!
If information technology does work for you, you should verify that it's the right hi command. Check the output of which hi - it might list something like /usr/bin/hello. What we're after is a binary nether the /snap/bin directory.
4. Exposing an app via your snap!
Defining commands
In lodge for services and commands to be exposed to users, you need to specify them in snapcraft.yaml of course! This will take care of a couple of things for you:
- it volition brand sure that services are automatically started/stopped
- all commands will be "namespaced", and then that you lot could, for instance, install the same snap from different publishers and still exist able to run the snaps separately
Exposing the hello command is painless. All you need to do is add the following to your snapcraft.yaml file:
apps: hello: command: bin/hello This defines an app named how-do-you-do, which points to the executable bin/hello in the directory structure shipped past the snap.
We generally advise to put this stanza between the metadata fields and the 'parts' field. Technically the social club doesn't affair, simply it makes sense to place basic pieces earlier more circuitous ones.
Our snapcraft.yaml file should at present resemble this:
proper noun: howdy base: core18 version: '2.ten' summary: GNU How-do-you-do, the "hello globe" snap clarification: | GNU hello prints a friendly greeting. grade: devel confinement: devmode apps: hi: control: bin/hello parts: gnu-how-do-you-do: source: http://ftp.gnu.org/gnu/hello/hello-2.10.tar.gz plugin: autotools Iterating over your snap
Now that the command is defined, let'due south rebuild the snap. You lot can do practise this by simply running snapcraft once again - only the new or changed elements will be built and merged into a new snap.
Withal, to evidence a more typical snap-building process, we're going to utilise a slightly dissimilar command that will permit us to peek into the snap we're building before the snap is created:
$ snapcraft prime --shell This command tells snapcraft to run the build upwards until the "prime" pace and open a crush within the snap build surroundings, with prime being the last stage in a four step procedure:
- pull: downloads or otherwise retrieves the components needed to build the office
- build: constructs the part from the previously pulled components
- copies the built components into the staging area
- copies the staged components into the priming area, to their final locations for the resulting snap.
Some other useful command is snapcraft --debug. This will open up a crush in the build environment when an fault occurs, letting you lot investigate the error before resuming the build.
From within the shell, y'all can encounter that while the binary we but added is in the stage directory, it'southward not all the same in prime:
$ ls stage/bin/ howdy $ ls prime/bin/ ls: cannot access 'prime/bin': No such file or directory You can continue building your snap from inside the build environment using the same snapcraft commands you use outside, with the convenience of having a prompt directly within the environment. To build the prime number phase, for example, just blazon snapcraft prime:
$ snapcraft prime number Skipping pull gnu-hello (already ran) Skipping build gnu-hi (already ran) Skipping stage gnu-hello (already ran) Priming gnu-hello + snapcraftctl prime The hello binary will at present be in the prime/bin directory:
$ ls prime/bin/ hello To resume the build and generate the snap, you tin type snapcraft inside the build environment, or exit and run snapcraft again from there. Either mode, the resultant snap will be placed in the snap projection directory.
We can at present re-install the new snap and run hullo:
$ sudo snap install --devmode hello_2.10_amd64.snap $ hello Hello, world! The path for the binary should exist correctly set also:
$ which howdy /snap/bin/hello Well washed! You've merely made your showtime working snap!
5. A snap is fabricated of parts
Allow's add another part to make the snap a scrap more interesting. In the 'parts' definition, make an addition:
parts: [...] gnu-fustigate: source: http://ftp.gnu.org/gnu/bash/bash-4.3.tar.gz plugin: autotools You volition observe that this role (named gnu-fustigate) works very much like the gnu-hello part from earlier: information technology downloads a tarball and builds it using the autotools plugin.
Every bit nosotros did before, we need to define the command we want to expose. Let's practise this now. In the 'apps' definition, add:
apps: [...] bash: command: fustigate This time the control name is different from the snap name. By default, all commands are exposed to the user equally <snap-name>.<command-proper name>. This binary volition thus exist hello.bash. That mode, nosotros will avert a clash with /bin/bash (system binaries trump binaries shipped past snaps) or any other snaps shipping a bash command. Nonetheless, as y'all may recollect, the first binary is named hullo. This is due to the simplification when equals . Instead of how-do-you-do.hello, we accept the command condensed to hi.
Our snap will thus result in two binaries being shipped: hello and hello.fustigate.
Notation that we fix bash equally the command parameter, and not bin/fustigate relative to the system snap directory ($SNAP=/snap/hello/current) as we did for hullo. Both are as valid because snapcraft and snapd create a small wrapper around your executable command which sets some environment variables. Technically, $SNAP/bin will be prepended to your $PATH for this snap. This avoids the demand to set the path explicitly. This topic volition be touched upon in upcoming sections.
Now re-do the build:
$ snapcraft Simply the gnu-bash part will be built now (as zippo inverse in the other part). This makes things quicker but since Bash is itself a meaning slice of software this command will still take quite some time to complete.
Install the resulting snap once more and check whether the new binary is available:
$ sudo snap install --devmode hello_2.10_amd64.snap $ hello Hullo, world! Now try fustigate:
$ hello.bash The above should yield:
bash-four.3$ env [ outputs a listing of surround variables ] Now leave that Bash shell:
bash-4.3$ exit You volition run into that the surroundings variables available from your snap are a little different from your user environment. Some additional variables are added similar $SNAP_ and some system environment variables have been altered to bespeak to your snap directory, like $PATH or $LD_LIBRARY_PATH. Take the time to get familiar with them!
Encounter Surroundings variables for further details.
Excellent piece of work! You take it all squeamish and working!
six. Removing devmode
One last thing you might desire to do before the snap is fix for wider consumption is to remove the devmode condition.
Of import:
Users of snaps using devmode will need to pass --devmode during the installation, then they explicitly agree to trust y'all and your snap. Another benefit of removing devmode is that y'all will be able to ship your snap on the 'stable' or 'candidate' channels (you can just release to the other channels, like 'beta' or 'edge' as your snap is less trusted) and users will exist able to search for information technology using snap discover.
For this to exist declared in your snap, let'southward set confinement to strict in snapcraft.yaml:
confinement: strict Now permit's build the snap and install it properly! That is, nosotros are going to phone call snapcraft without --devmode to really examination information technology under confinement:
$ snapcraft [...] $ sudo snap install hello_2.10_amd64.snap Yikes! This gives:
error: cannot find signatures with metadata for snap "hello_2.10_amd64.snap" Indeed, nosotros tried to install a snap that wasn't signed by the Snap Store. Previously, nosotros performed local installations via --devmode which unsaid (in add-on to being run without confinement) that an unsigned snap was OK to be installed. Every bit this is not the case whatsoever more than we demand to signal that it's OK to install an unsigned snap. This is washed via the --unsafe option:
$ sudo snap install hello_2.10_amd64.snap --unsafe Test again!
$ hello Howdy, world! Creating a new trounce
$ hello.bash …and issue a control in that location:
bash-4.3$ ls now gives:
ls: cannot open directory '.': Permission denied Exit the trounce for now:
fustigate-iv.three$ go out What'southward happening hither? Your snap is not broken, it'due south just confined now and so it can only admission its ain corresponding directories.
Note:
For other snaps you might demand to declare if commands or services need special permissions (e.g. access to the network or audio). A tutorial on "interfaces", "slots", and "plugs" will cover this very topic.
You are washed. This snap is ready for publication. Awesome!
7. Push to the store
Applications are hands uploaded to the Snap Shop. Registering an account is easy, then let's exercise that beginning.
Registering an account
Begin past going to the Snapcraft dashboard and clicking on the "Sign in or register" button in the top-right corner:

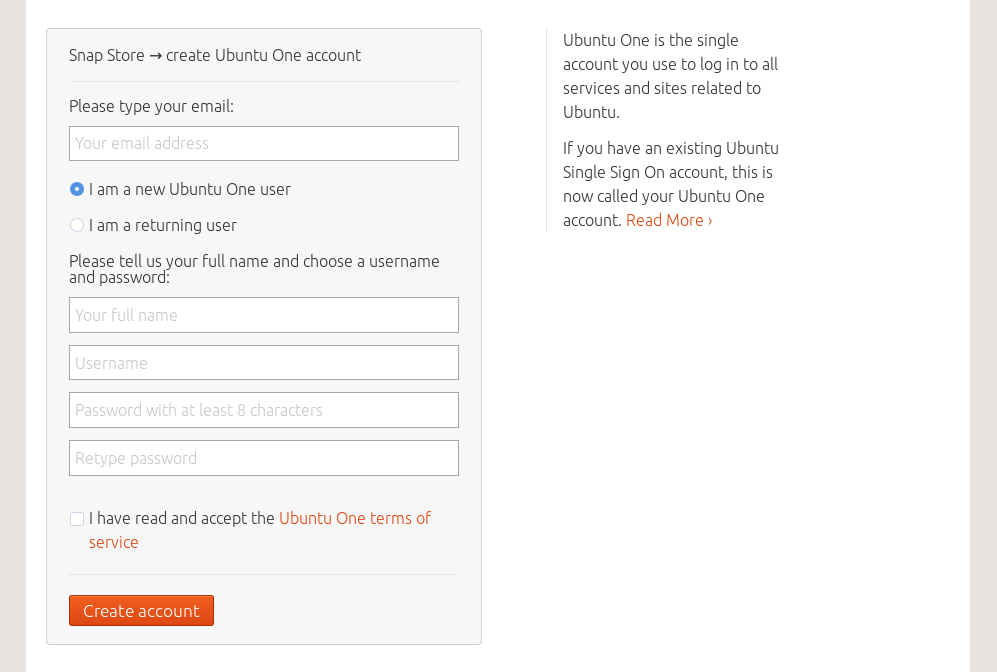
If you practise not already have an Ubuntu One (SSO) account and so select "I am a new Ubuntu One user" and consummate the needed data:
In one case logged into Ubuntu One you will see your name in the top-right corner. Click your proper noun to reveal a menu and so cull "Account details". Y'all volition need to concord to the Developer Terms and Atmospheric condition before clicking the greenish "Sign up" button:

Your current settings will be displayed. Review them. Your "Snap store username" may be preset and non-editable. There are "Contact details" you may wish to fill out every bit well as a personal photo to upload.
If you fabricated whatsoever changes, printing the green "Update my account" push.
Control-line authentication
We'll at present log in with the snapcraft control using your new account. The outset time you practise and so yous volition exist asked to enable multi-cistron authentication and agree with the developer terms & conditions:
$ snapcraft login A sample session follows:
Enter your Ubuntu 1 electronic mail accost and password. If you do not have an Ubuntu I account, you tin create one at https://snapcraft.io/account Email: myemail@provider.com Password: 2d-factor auth: (press Enter if y'all don't use two-factor authentication): Login successful. You tin log out whatever time with snapcraft logout.
Register a snap name
Before beingness able to upload a snap, you will demand to annals (reserve) a name for information technology. This is done with snapcraft register <some_name>.
Here, assuming javier is the store username established to a higher place, we'll exercise:
$ snapcraft annals javier-hello A sample session follows:
Nosotros always want to ensure that users get the software they await for a item name. If needed, nosotros will rename snaps to ensure that a detail proper noun reflects the software most widely expected by our community. For example, nigh people would expect 'thunderbird' to be published past Mozilla. They would also look to be able to become other snaps of Thunderbird as 'thunderbird-$username'. Would you say that MOST users will expect 'javier-hello' to come up from You, and be the software yous intend to publish there? [y/N]: y Registering javier-hello. Congratulations! You're now the publisher for 'javier-hello'. Clearly, the Store prefers the name to be of the format <local snap name>-<store-username>.
The snap name javier-hello is dissimilar from howdy that we initially placed in our snapcraft.yaml file. Nosotros volition need to edit that file accordingly and rebuild the snap. This is also an opportune time to change the 'grade' to 'stable'!
The file should at present include the following lines:
name: javier-hello class: stable Rebuild:
$ snapcraft You lot should now take a snap package called javier_-hello_2.10_amd64.snap.
Notation:
Recall that y'all already installed a snap parcel chosen hello_2.10_amd64.snap. Don't forget to uninstall it with sudo snap remove hello.
Push and release your snap
It's time to make this snap available to the world!
Let'due south release it to the 'candidate' channel for at present:
$ snapcraft upload javier-hello_2.10_amd64.snap --release=candidate Output:
Pushing javier-hello_2.10_amd64.snap Afterward pushing, an endeavour will be fabricated to release to 'candidate' Preparing to push '/home/ubuntu/mysnaps/hullo/javier-hello_2.10_amd64.snap' to the store. Pushing javier-hello_2.10_amd64.snap [=====================================================] 100% Processing...| Ready to release! Revision 1 of 'javier-hello' created. Runway Curvation Channel Version Revision latest amd64 stable - - candidate 2.x ane beta ^ ^ edge ^ ^ The 'candidate' channel is now open. You should receive an electronic mail informing you that your snap is pending review (automatic checking). If yous are not using any reserved interfaces and security checks are passing, users volition be able to install it like then:
$ sudo snap install javier-hello --channel=candidate As we uploaded an amd64 binary, but people on 64-bit machines will get access to this snap. You tin can either focus on one architecture to support, manually build a binary for each compages you wish to back up, or use remote build or build.snapcraft.io to push your snapcraft.yaml, and get resulting snaps built on all architectures for you!
Encounter Build options for more details.
From hither, if you are happy with the testing of your snap, yous tin apply the snapcraft release command to have fine-grained command over what you are releasing and where:
snapcraft release <snap-name> <revision> <aqueduct>
Therefore, to release javier-hello to the 'stable' channel, and make it immediately visible in the Shop:
$ snapcraft release javier-hi ane stable Remember that snaps with solitude: devmode tin can't be released to the 'stable' or 'candidate' channels.
The spider web interface will give you data about the publication status. Accept a look to see all the available options!
viii. That's all folks!
Like shooting fish in a barrel, wasn't it?
Congratulations! You fabricated it!
Past at present you will have built your first snap, fixed build problems, exposed user commands, learned most uploading snaps to the Snap Store, and found out about a lot of other useful details (plugins, snapcraft help, channels, etc.).
For reference, the terminal land of your snapcraft.yaml file should exist as follows:
name: howdy base of operations: core18 version: 'ii.10' summary: GNU Hullo, the "hello world" snap description: | GNU hello prints a friendly greeting. grade: stable confinement: strict apps: hello: command: bin/hello bash: command: bash parts: gnu-hello: source: http://ftp.gnu.org/gnu/hello/hi-ii.10.tar.gz plugin: autotools gnu-fustigate: source: http://ftp.gnu.org/gnu/bash/bash-4.3.tar.gz plugin: autotools Side by side steps
- Take a look at tutorial Build a nodejs service snap. It is the logical follow-up to this tutorial. It includes debugging techniques, more than data on confinement, and how to package a snap as a service.
- Learn some advanced snap coding techniques past looking at some of the other snap tutorials.
- Join the Snapcraft community on the Snapcraft forum.
Further readings
- See the Snapcraft documentation for the definitive snap and snapcraft documentation.
- The Snapcraft control reference covers all command syntax and options, including those for the daemon.
fergusonstife1957.blogspot.com
Source: https://ubuntu.com/tutorials/create-your-first-snap
0 Response to "How to Watch Snap Videos Again"
Postar um comentário